
The Ultimate Hut-to-Hut Packing Guide: How to Trek Light Anywhere in the World
Hiking from hut to hut is the "sweet spot" of trekking. You get the adventure of the trail during the day, but the luxury of a roof and a bunk at night. This means you can ditch the heavy tent and sleeping pad, allowing for a much lighter, faster experience.
When we tackled the Laugavegur Trail in Iceland, we managed to get our pack weights down to around 7-8kg (16-18lb), excluding food. We started with 15kg and finished at 7kg. Here is our universal guide to packing for any multi-day hut adventure and exactly how we packed to stay light, warm, and well-fed.
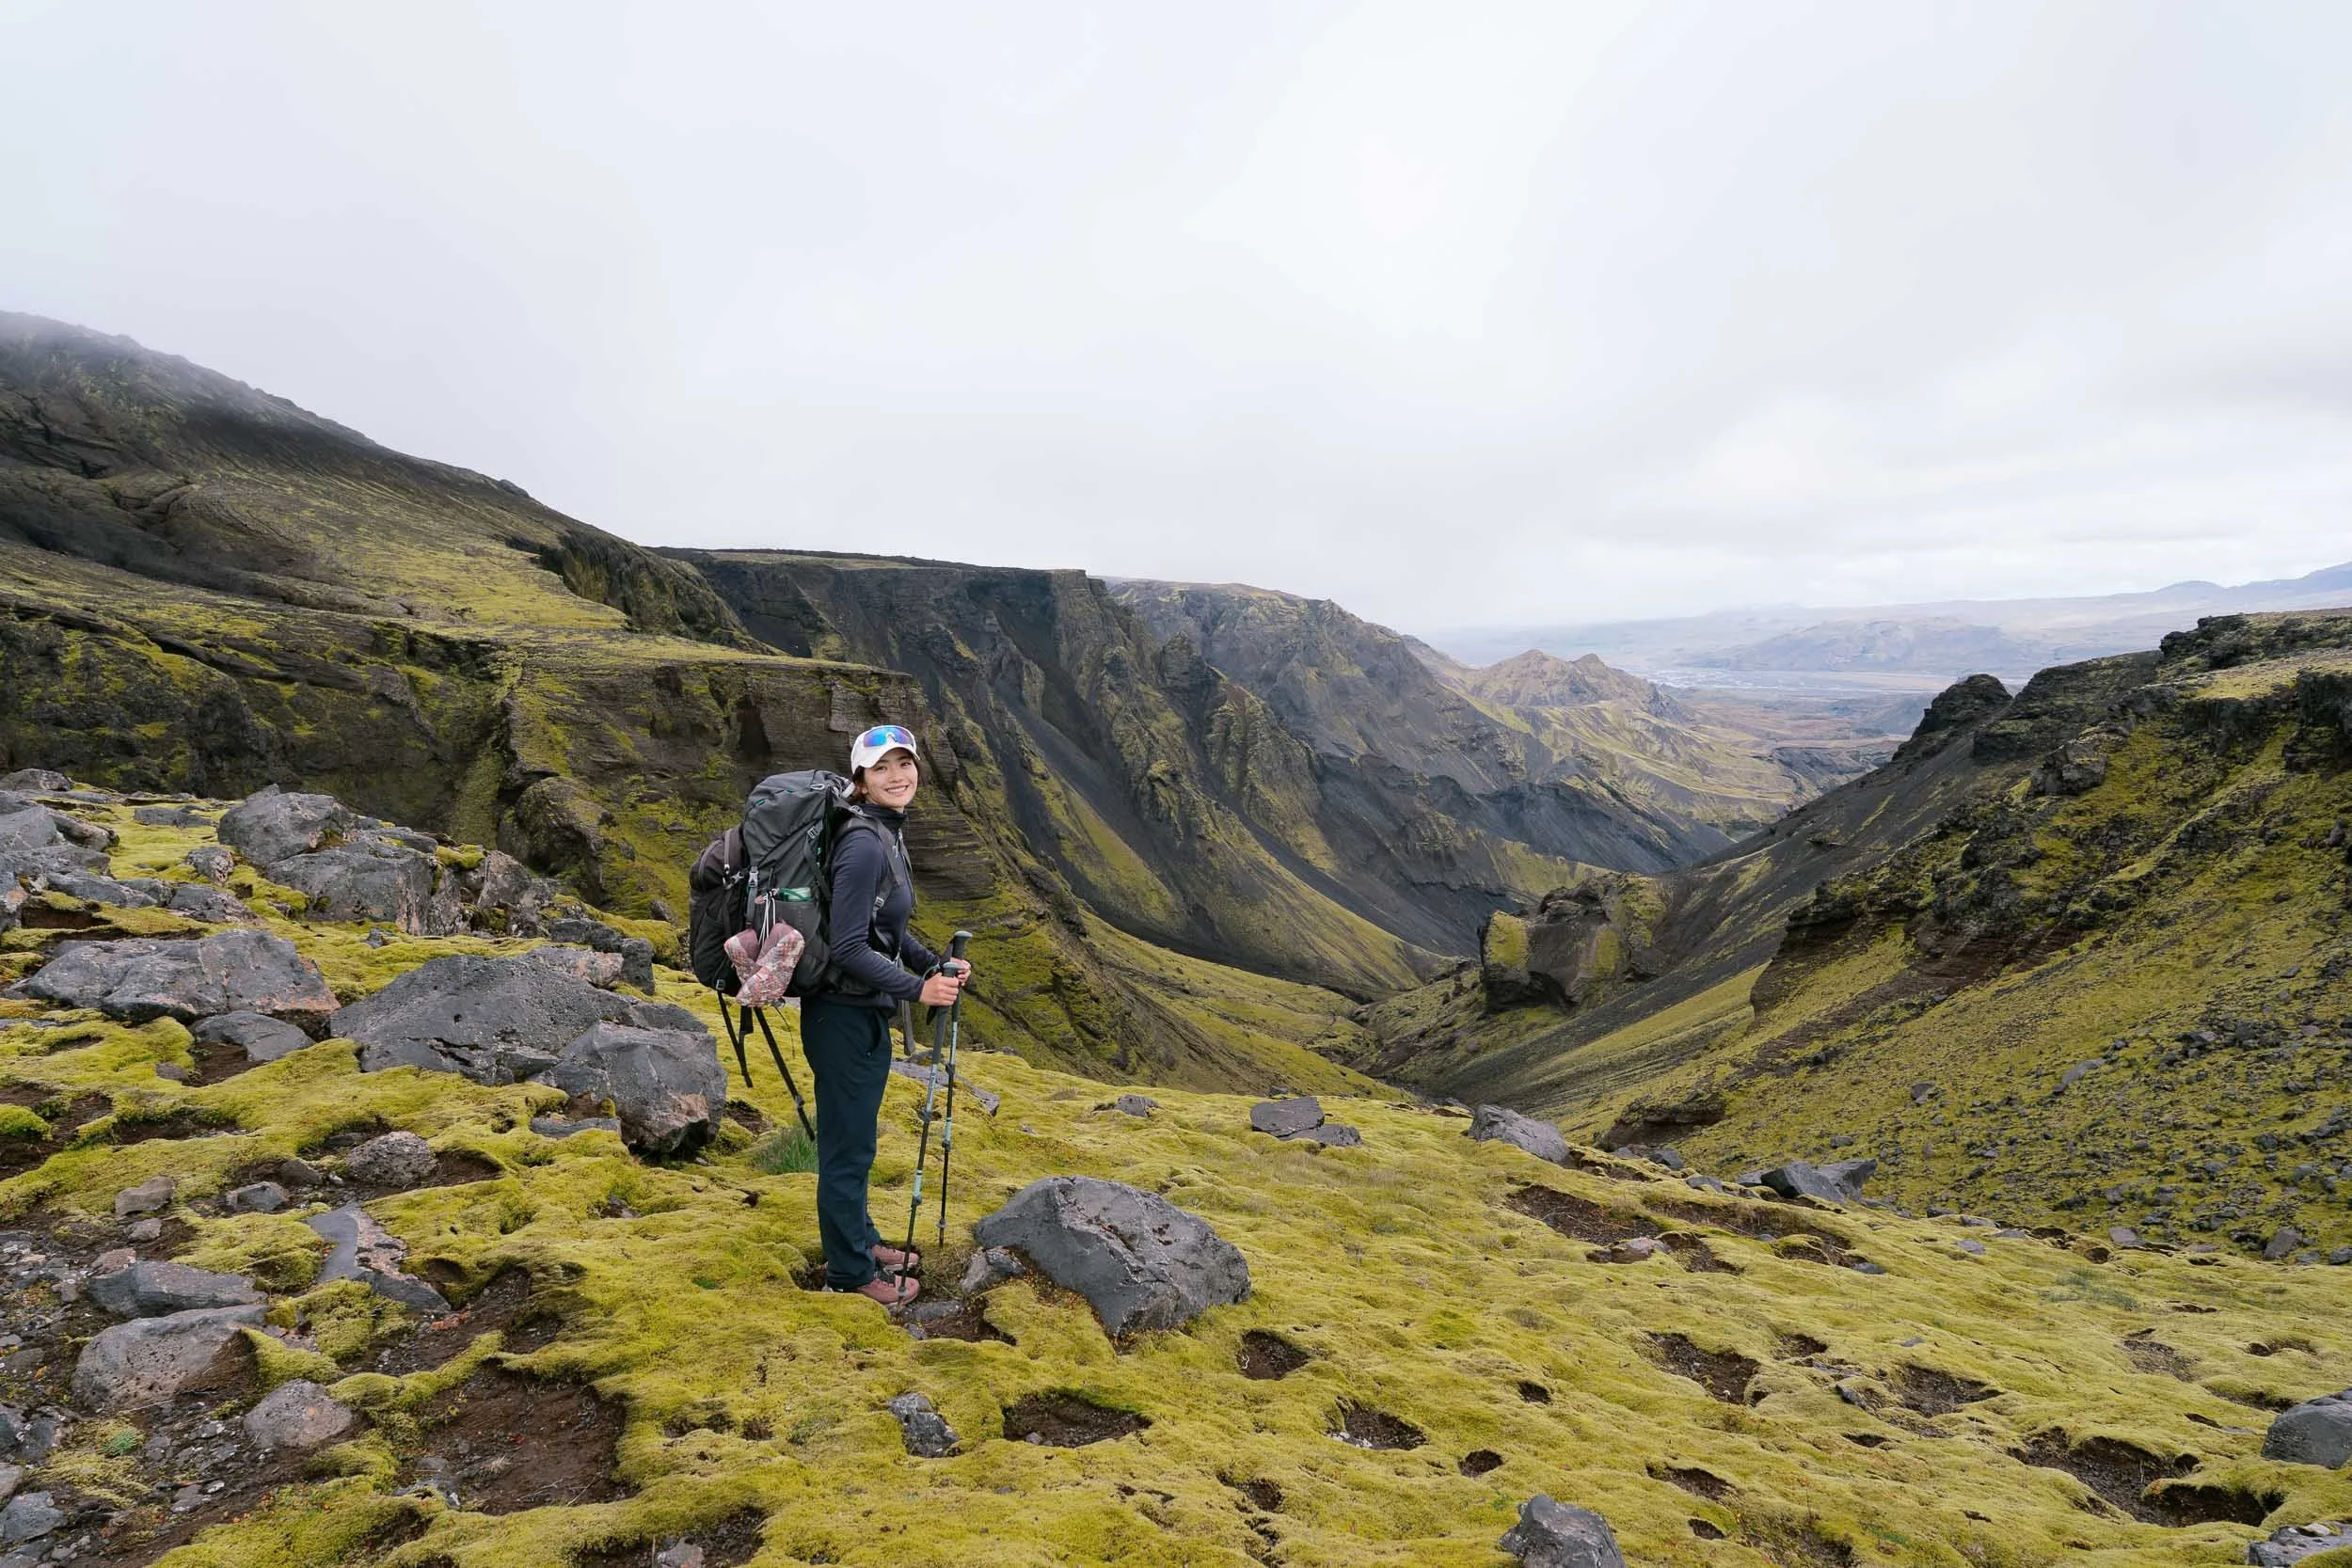
Viv’s pack for Laugavegur Trail in Iceland
1. The Multi-Day "Hut Pack"
Since you aren't carrying a tent, stove, or sleeping mat, your backpack can be much smaller and lighter than a traditional camping rig.
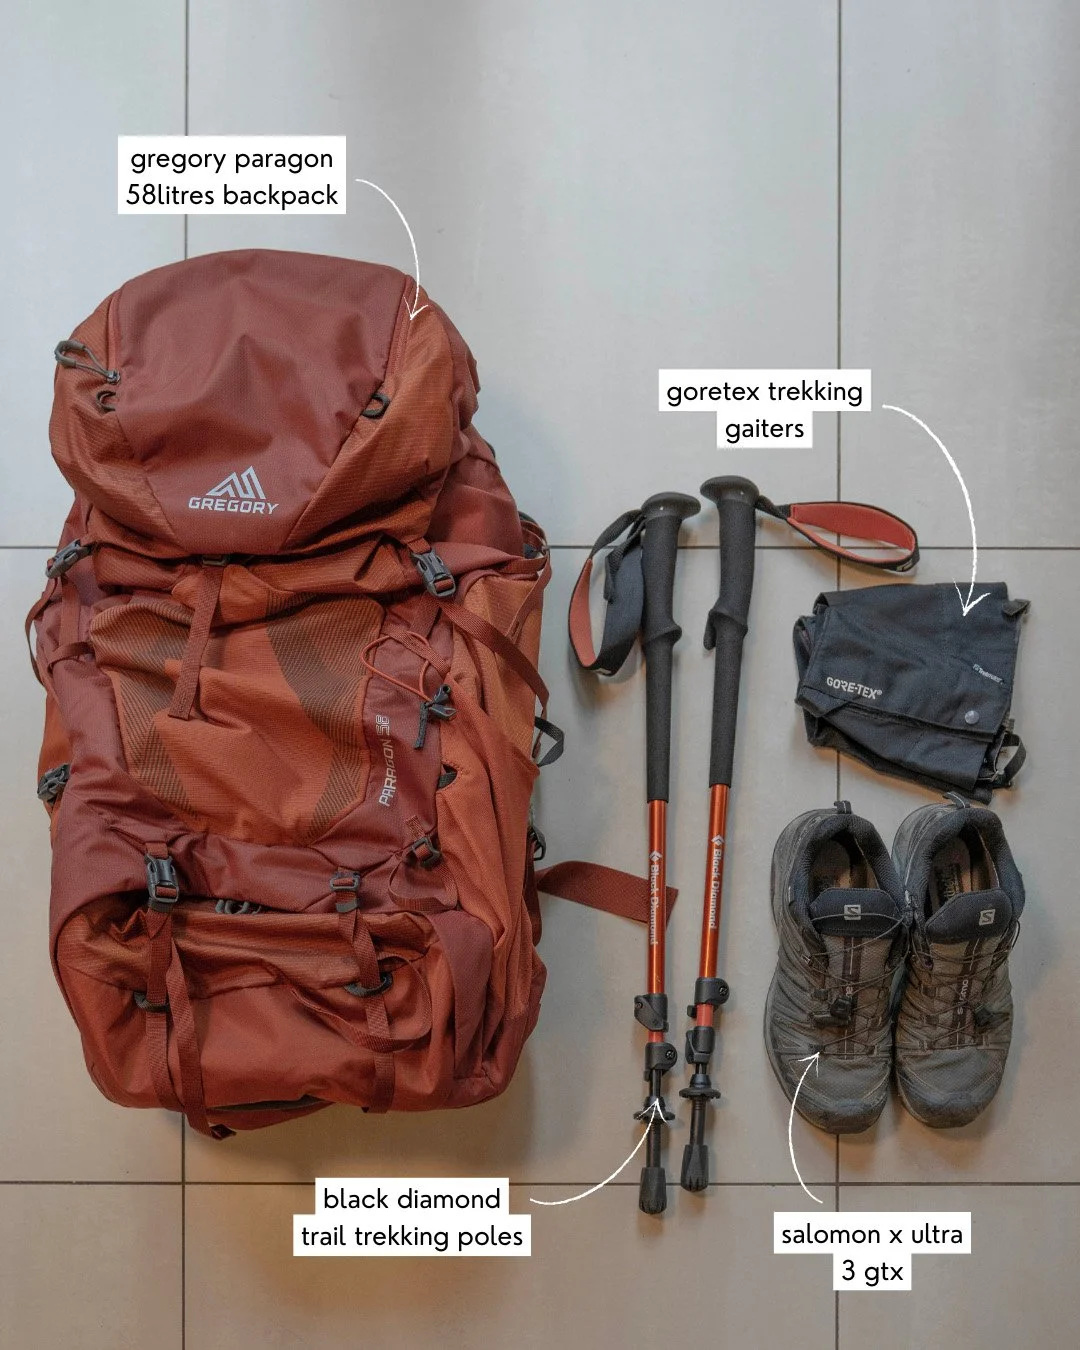
Capacity: We used a Gregory Paragon 58 and an Osprey Renn™ 50, but if you're a true minimalist, a 40L pack is the sweet spot.
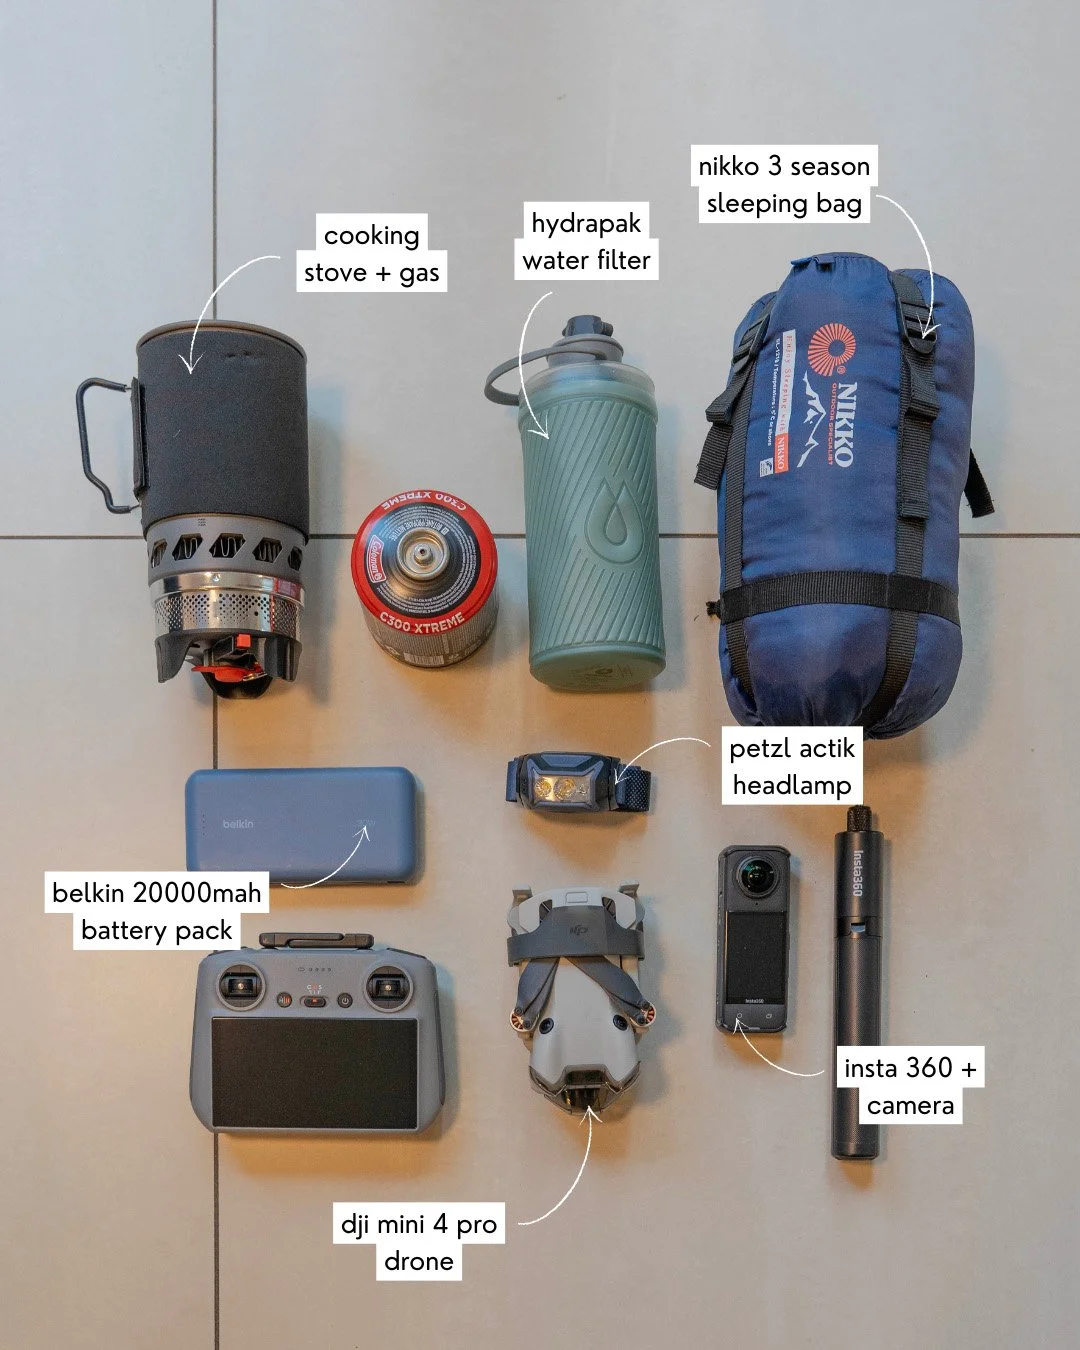
The Sleep System: Most mountain huts provide a mattress and some provide blankets as well. If sleeping in huts, a 3 season sleeping bag is what we would recommend. Please note that a sleeping bag liner is often mandatory for hygiene.
Hut Shoes: Most huts have a "no boots inside" rule. Pack lightweight sandals or slippers (like Crocs) to wear in the evenings. They also double as shower (or river crossing) shoes!
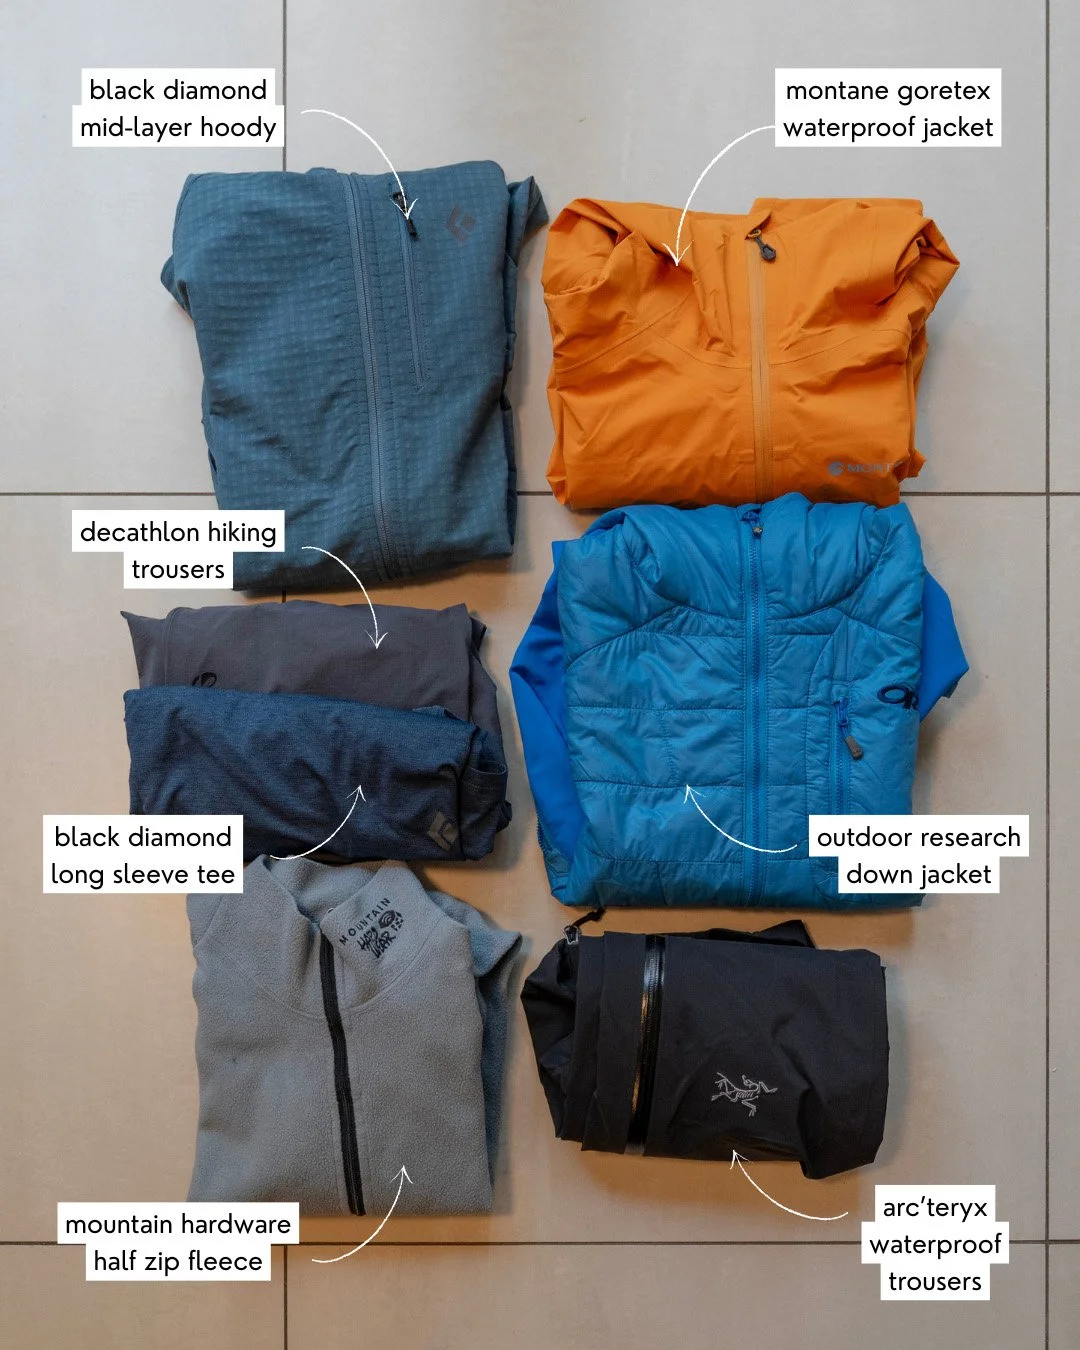
2. The Smart Layering System
Weather in the mountains is notoriously fickle. The key is to pack versatile layers rather than multiple outfits. We recommend just two sets of clothes: one for the trail and one for the hut. Make sure to keep your extra set of clothes in a dry bag!
Merino Base Layers: Merino wool is the gold standard. It’s warm, breathable, and most importantly, naturally odor-resistant. You can wear it for several days straight without needing a wash.
The Mid-Layer: A lightweight fleece or a synthetic mid-layer provides warmth during early morning starts.
The "Puffy": A down jacket is essential. It provides the best warmth-to-weight ratio and packs down to the size of a water bottle.
The Shell: A high-quality waterproof jacket and trousers are non-negotiable. They protect you from the wind just as much as the rain.
3. Food & Hydration
Many hut systems offer "catered" options (breakfast and dinner), but some don’t so you'll still need to manage your trail energy.
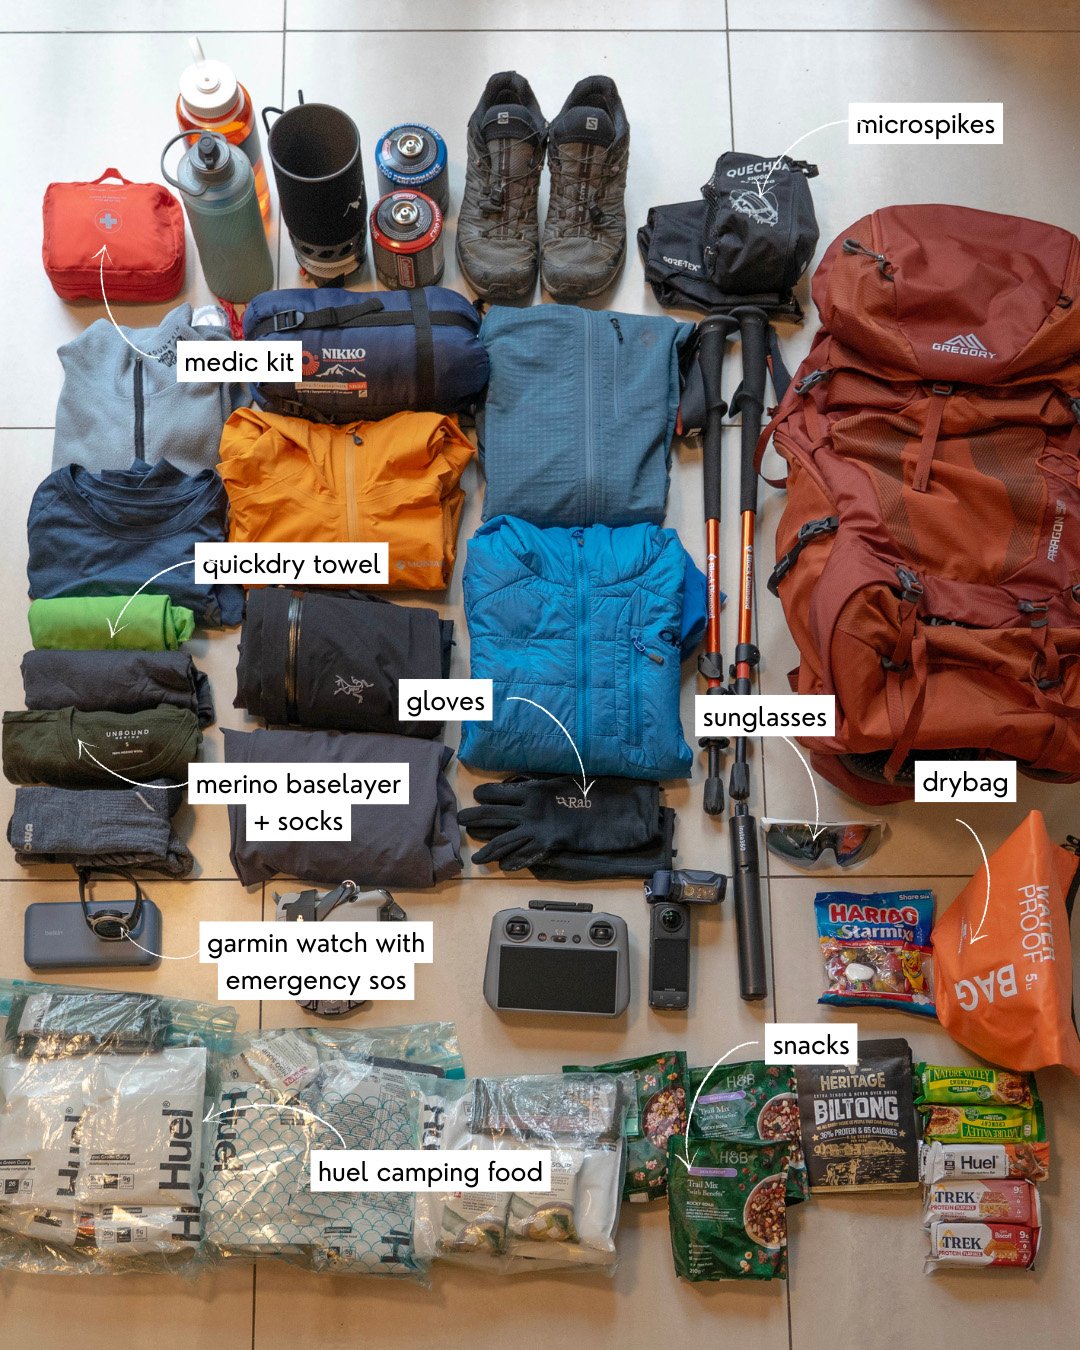
Lightweight Meals: If your huts have kitchens, freeze-dried meals (like Huel or mountain-specific brands) are the most weight-efficient way to eat.
High-Energy Snacks: Pack calorie-dense snacks like biltong, nuts, and protein bars.
Water Filtration: A bottle with a built-in filter (like a Hydrapak that we personally use) allows you to refill safely from streams along the way, so you don't have to carry 3 liters of water at once.
4. Essential Tech & Safety
Even on well-marked trails, self-sufficiency is key to staying safe.
Power: A 20,000mAh power bank will usually last 4-5 charges, keeping your phone (for maps) and camera gear charged.
Navigation: We always use a Garmin watch with SOS and AllTrail Peak offline maps on our phones.
Lighting: A headlamp is essential for navigating dark dormitories at night or early alpine starts.
First Aid: Don't forget a small medical kit stocked with blister plasters, antiseptic, and basic painkillers.
Satellitte Communicator: Garmin inreach mini 2
Why We Love Hut-to-Hut
The best part of this setup is the freedom. Your pack is light enough that you can actually enjoy the climbs and bring our camera equipment without dragging us down. Staying in a hut means your evenings are spent sharing stories with fellow hikers in a warm hut rather than shivering in a tent. Ready to hit the trail? See our gear list for 2026!
Full Disclosure: Some of the links in this post are affiliate links. This means that if you choose to make a purchase or booking through them, I may earn a small commission at no extra cost to you. This helps me keep this blog running and continue sharing guides like this one. Thank you for your support!